
Best Drone Helicopters With Cameras Review 2023 Product (No.1) Sales
Our top pick combines easy flying, long range, great image quality, three-axis stabilization, and great fail-safe features in a sub-$1,000 package.
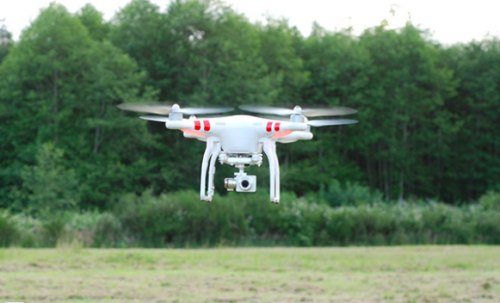
After more than 20 hours of research, a trip to the first ever InterDrone convention in Las Vegas, interviews with UAV experts, and multiple days testing four close competitors, we can say that the DJI Phantom 3 Advanced (the update to our previous pick, the DJI Phantom 2 Vision+ V3.0) is the best drone for the aspiring aerial photographer or videographer. Improving on its predecessor, the Phantom 3 Advanced offers a combination of value, ease of use, advanced features, and reliable operation that nothing else currently available can match. Easier to control than the other drones we tested, the Phantom 3 Advanced offers a range that extends further than the eye can see, plus 18 minutes of flight time so you can make use of that range, along with a high-quality camera that captures 2.7K or 1080p footage and a smartphone app that lets you preview your on-drone camera for photography and first-person-viewpoint piloting ease. The only real drawback is that you’ll need a current smartphone or tablet to take full advantage of its FPV and live-streaming features.
Why you should trust me
A year ago, I drove across the country for a month interviewing consumer-drone enthusiasts, professional pilots, manufacturers, and sellers for this feature in Outside magazine military drones for sale. As a result, I learned just about everything there is to know from the perspective of an amateur drone pilot. I’ve also flown myself about 150 times—enough to know what I’m doing, but not so much that I’ve forgotten what it’s like to take off for the first time.
Who is this for?
Flying drones for the sake of flying them is entertaining, but the real reason for their recent popularity is their ability to shoot birds-eye-view photos and videos that humans have never been able to get without an ultralight or hang glider or parachute or helicopter.
As professional photographer Corey Rich told me, “They are game-changing devices. They get our cameras in wild, unexpected positions, positions that are otherwise totally unachievable.” Indeed, a camera-equipped drone is the best zoom lens ever invented. And at their current prices, anyone who cares about photography enough to buy a decent camera should consider a drone.
I don’t think there’s a piece of technology since the iPhone and the Oculus that I’ve been more excited about than gyro-stabilized, GPS-stabilized quadcopters,” says Norman Chan from Tested.
As flying robots, some are even capable of more, doing things like lifting cases of beer to inspiring slack-jawed praise. But for most of us, the big appeal is their ability to shoot photos and video from radical new perspectives.
How we picked what to test
There are many types of drones out there, but amateur photographers really only need to consider quadcopters because others will lack the stability of a quad and be too complicated or expensive. These simple and reliable drones typically feature a square-ish frame shaped like an X or H and have one rotor in each corner that generate enough combined lift to carry a pound or two, keep stable in winds up to about a dozen knots, and move in both indoor and outdoor settings. There are other types of drones worth considering for niche activities like 3D mapping or action-sport selfies, but if you want to shoot a variety of great footage, a quadcopter is what you want.
Most people want a quadcopter that is ready to fly. Quads are sold in various states of assembly, ranging from kits to partially-assembled aircraft that require accessories for filming to fully assembled “Ready to Fly” (or RTF) models that come installed with everything you need to get going. Unless you want to tinker with complicated setup procedures because it’s a hobby of yours, you want the latter. After a pilot charges the battery and attaches the propellers on an RTF quadcopter, he’s ready to roll camera. Buying a kit costs maybe 20% less than a ready-to-fly version but requires at least six hours to build, a knowledge of soldering, and a willingness to wade into horizon-obscuring online forums to beg for help.
Most enthusiast drones are roughly the same size and shape, around 350 mm at their widest, offering nice balances between stability and agility. They happily fly in around 10 knots of wind and can slalom through trees, for example.
RTF quadcopters for filming range from about $200 for something like a Hubsan X4 to easily $9,000 for a DSLRPros-Helix. The sweetspot lies in the mean, between about $500 and $1,500. Spending less means losing out on crucial stability-management features in addition to severely limiting your flight range to a couple hundred feet from the transmitter. Spending more usually means you’re a filmmaker with an expense account, one not afraid to hoist a DSLR or video camera high above hard ground and pay a couple thousand dollars for a gimbal like the Cinestar to stabilize it. Professional rigs like that take the best images and the gimbals can pan in all directions, not just up and down, but they’re trickier to use, often requiring two remote controls, for starters. They also cost as much as a used car.
Our preliminary pick
Which $500 to $1,500 model is best? People certainly have opinions. Skypixel, created by underwater and aerial film maker Eric Cheng before he was hired on as director of aerial imaging for DJI, offers some nods to favorite models, a great intro to quadcopters, and clear instructions for how to upgrade them. MicBergsma has excellent YouTube reviews and tips for DJI pilots. Tested has a good “how to get started” article.
A couple other authorities help single out top models with a handful of reviews, including Flite Test, the excellent new MultirotorPilot Magazine, Gizmodo, Gizmag, and WIRED. There are also lots of gushing YouTube reports on the latest thing and some nuanced opinions hidden deep in online forums like HeliFreak, RC Groups, OpenPilot, Phantom Pilots, and DIYdrones. Business Insider has a round-up of the 12 “Best Drones You Can Buy” that includes two models that you can not, in fact, buy—the Pocket Drone, which won’t ship until late summer 2014, and the UAIR R10, which has no physical or online store.
Taken together, the info in these reviews is almost bewildering. But it’s not.
A great RTF quadcopter for filming must take crisp, properly framed videos and stills. A year ago, you could impress people with images from a GoPro tossed in the air. Now, with even Martha Stewart flying a camera-equipped multirotor at her farm, the bar has been raised.
In addition to a nice camera, the ability to livestream footage to the pilot is a must. “The most important thing, of course, if you are flying to shoot, is to see what your composition is,” says filmmaker Philip Bloom. “Flying blind is pretty pointless when shooting.” Indeed, the ability to see what the camera is filming—a feature called First Person View, or FPV—is key. Combined with lights on the drone, good FPV displays also help you determine which direction the quadcopter is facing even when it’s far away, so you don’t get turned around.
A top-quality gimbal is also essential for producing smooth footage. The gimbal, which usually dangles below the quadcopter, holds the camera steady even when the quadcopter moves. Amateur gimbals, those that cost less than a couple thousand dollars, typically stabilize the camera in two planes, holding it still when the quadcopter tips forward or backward and tilts side to side. The best amateur gimbals hold the camera steady in three planes, also stabilizing the camera if the quadcopter twists a little. The result is shake- and wiggle-free footage.
Great quadcopters for filming must also be easy to use. Pilots want to spend their time taking great shots, not soldering on accessories or reading complicated instructions.
A great quadcopter has at least two flying modes a pilot can switch between. The first mode uses GPS, altimeters, and/or accelerometers to hold the quadcopter precisely where it stops in the air, allowing for shots that look like they were taken from atop an immobile crane. (This mode is usually called something like stability mode.) The second mode keeps the quadcopter level but also allows it to carry its momentum when the pilot lets off the controls, providing gliding, steadicam-like shots. (This mode is usually called something like agility mode.)
It should also fly for at least 10 minutes between charges, preferably much more. Yes, the best footage from quadcopters is stitched together from segments that each took no longer than about 15 seconds to film, but more time allows a pilot to better get in position for shots and provides a larger margin for safety. No one wants to be running on fumes Top Gun-style when heading back to the launch point.
Lastly, a great quadcopter automatically brings the drone back to the launch pad when a switch is flipped or the controller loses contact with the aircraft. And one is supported by a robust community of online enthusiasts or dealers in case questions arise.
While the cost of spare parts, travel cases, extra batteries, and other desirable accessories can quickly empty wallets, a quadcopter’s price is not paramount. Unlike kite flying, aerial filming will never be a cheap hobby. And there’s always the chance that you’ll crash your quadcopter horribly or run into some kind of fluky interference that causes a dreaded “fly away” (which is exactly what it sounds like). You shouldn’t spend more on a quadcopter than you’re ready to lose. Then again, if you trust in your ability to fly calmly and avoid wrecks (or are willing to purchase a robust insurance policy to go with it), this is an investment that will last for years to come.
With those requirements in mind, there are maybe 50 camera-carrying models of RTF quadcopter between about $500 and $1,500. DJI, AR Parrot, 3D Robotics, Walkera, and Blade are the most popular. Among these companies, DJI is currently the undisputed frontrunner.
“There’s no doubt that DJI has the enthusiast RTF multirotor market cornered,” says Erick Royer, executiveeditor of MultiRotor Pilot magazine. “They’re the largest brand and the fastest innovating, with an incredible product line.”
Boutique brands Lumenier, which sponsors the best pilots in America, and Hong Kong–based BlackSheep, which is known for daredevil flights around the world, also attract devoted fans.
To find the best RTF quadcopter for filming, we at first tried eliminating quads that were poorly reviewed (like the Lotus RC T580P) or not at all reviewed (like the Seraphi Phantom) or sold RTF by suspicious foreign sites (like the Tarot Ironman 650). This winnowed the list, and ultimately, for safety in purchasing and flying, we decided to stick with well-known names sold by reputable companies. So we compiled a spreadsheet of specs and recs for 19 promising models either touted by experts or sold by the five most popular brands: AR Parrot, DJI, 3DRobotics, Walkera, and Blade.
Many of them, unfortunately, lacked a pre-installed gimbal and FPV set up to show a live view of what the camera was seeing.
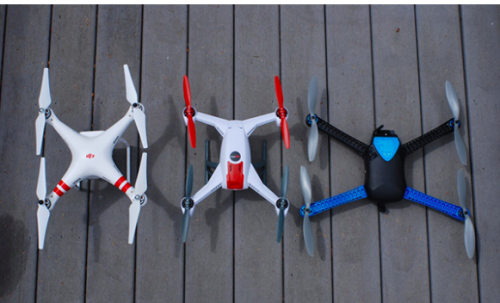
After eliminating the stripped-down models, we were really only left with three choices: the DJI Phantom 2 Vision+, Blade 350 QX2, and the Walkera QR X350 PRO. Among these, the V+ stood head and shoulders above the competition. Its three-plane gimbal, superior FPV capabilities, multiple flight modes, and glowing user and professional reviews made it the clear frontrunner despite its high $1,300 price tag. But was it really that much better than the other two, which are $900?
We still wanted to compare it to its closest competitors. Unfortunately, the Walkera was a bit of a nonstarter: It’s held back by a second-tier camera (although its gimbal is able to support a GoPro Hero 3), a less-advanced two-plane gimbal, and insufficient editorial support. The Blade, however, has a good camera, and at $900 it is significantly cheaper than the V+. It also only has a two-plane gimbal compared to the V+’s superior three-plane gimbal and the package wasn’t shipping when we tested, but it had enough going for it on paper to justify testing the naked version.
We also called in the 3DR IRIS, which doesn’t have all the features we wanted out of the box, because it is highly touted by the DIY crowd and can be modified to do a lot of really neat things if you’re willing to tinker with it.
Additionally, we called in the $90 Blade Nano QX. It doesn’t have any of the filming features we want, but it’s widely regarded among experts and buyers alike as the best trainer drone for novices due to its durability, ease of use, and low price. (Read more on this in the next section.)
The goal of testing was to understand how easy the quadcopters were to assemble, to appraise the quality of the instruction manuals, and to ensure that other reviewers hadn’t missed anything. As such, I flew them around my house a half dozen times and twice at Castleman Field, an RC field outside of Seattle maintained by members of the Olympic Radio Control Association. Since I came into this guide with more flight experience than your typical novice drone pilot, I also enlisted my 73-year-old father, a true beginner, to take the controls and offer feedback on several occasions.
Get this first: our pick for a trainer quadcopter
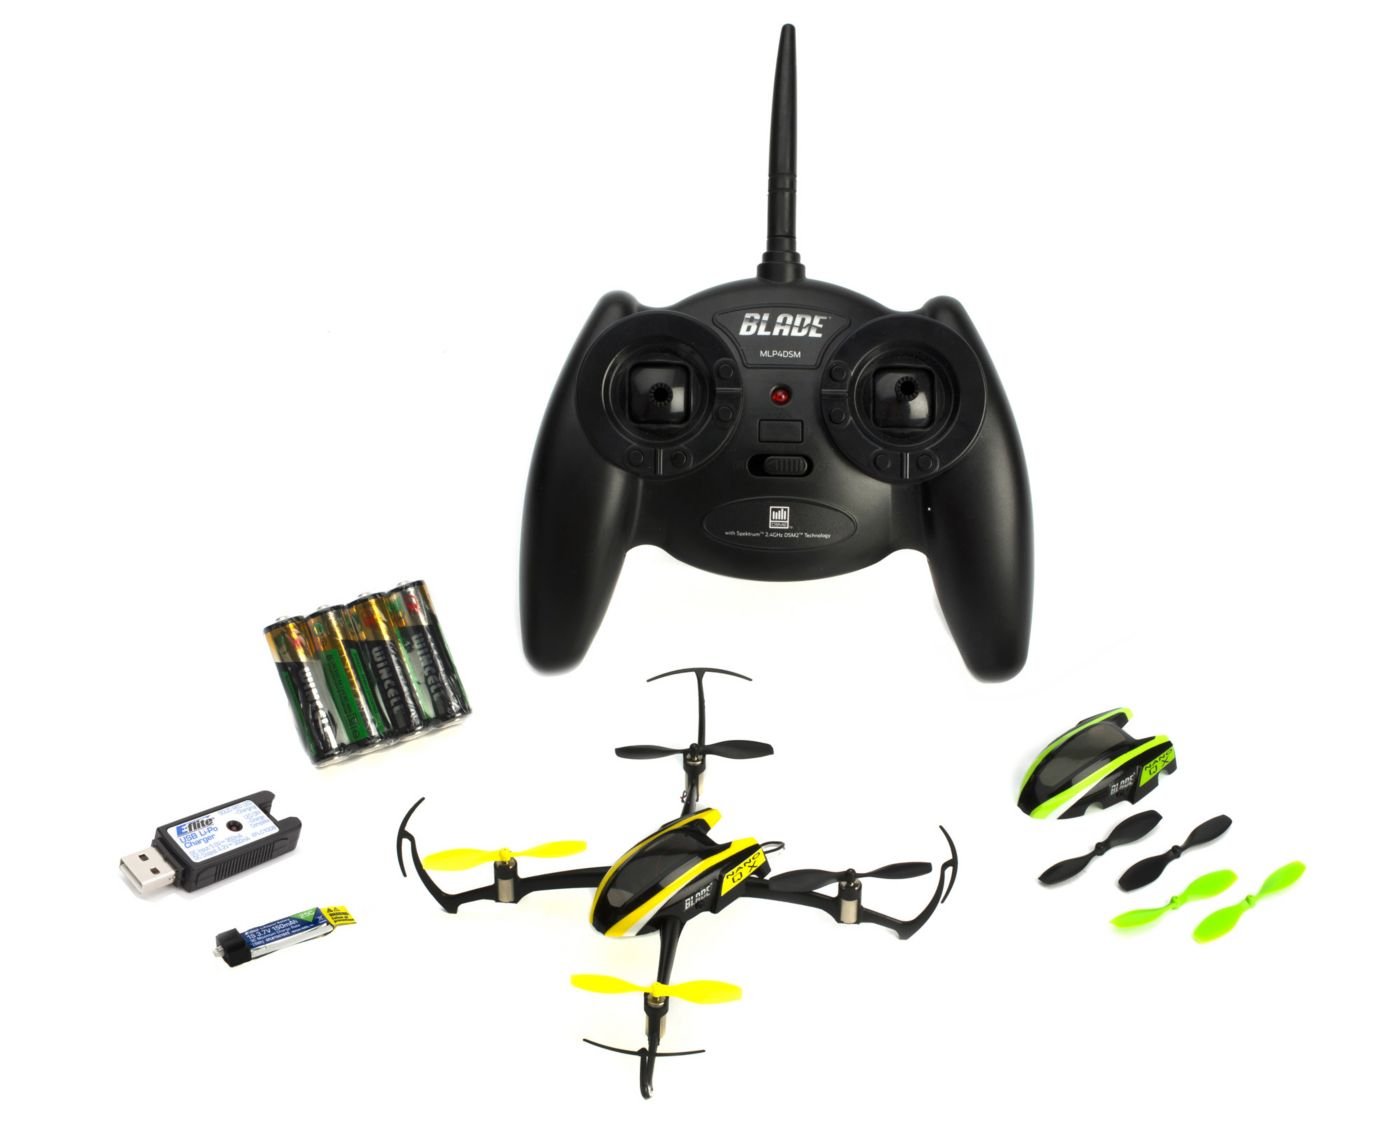
Virtually every expert I spoke with for this article recommended a trainer RTF quadcopter, either as your first quadcopter or, more commonly, a side dish. Most experts we spoke to recommended the little $90 Blade Nano QX, and we found it to be joy to fly during our own tests. It was easy to set up and use, and it proved itself to be durable enough to survive many crashes.
If you can fly the Blade Nano QX for 20 minutes a day for two or three weeks (or fly it for 10 minutes only crashing it once or twice), you can fly our main pick—a GPS-stabilized DJI Phantom Vision+—without much fuss in wide open areas. It’s good to get in the practice first before venturing out into the world with a much more expensive device.
“It’s surprisingly stable and durable,” says Cheng. “You can crash it into the ceiling, down on the floor, sideways; it doesn’t matter.”
“We recommend starting small, with something that’s ready to fly—specifically, the Nano QX,” says Alex Zvada, creative director of Flite Test, a popular online show that’s like Top Gear for all things radio controlled.
“I really like that little Nano QX,” says Bill Kumpf, head of a quadcopter flying club outside Seattle called Quad ‘n Copter.
“If you’re going to learn how to fly a multirotor, the Nano is a great machine to practice on,” says Royer.
In testing, the Nano was fantastic. The palm-sized quadcopter was ready to go within five minutes of unboxing. It flew for roughly 10 minutes on a charge, and its batteries, just $21 for four, recharged in roughly 20 minutes. It was small enough to fly indoors; There’s no need to wait for rain to pass or winds to abate.
Best of all, it behaved much like a camera-carrying quadcopter…while proving tougher than a diamond. We slammed it into the pavement or trees at least four dozen times before needing to order a $9 replacement frame. (Replacement motors, propellers, flight controllers, and other parts are easily replaced for only a few bucks.) We even crashed it into a saltwater bay. After we fished it up from the bottom, rinsed it off, and dried it out, it continued to fly great.
Along the way, we honed our ability to glide as smoothly as a jet, slalom gracefully through a forest, circle a basketball hoop. Even after testing was complete, my 73-year-old father flew it once or twice a day for weeks. The thing turns practicing into pure, uninhibited fun.
If the Nano is sold out or pushes past $100, opt for the $80 Dromida Ominus UAV Quadcopter RTF. It doesn’t have the editorial awards of the Nano or the widespread expert endorsement, but 147 reviewers give it an average of 4.1 stars, making it one of the best-reviewed quads on Amazon. And it’s pretty darn similar to the Nano. Like the Nano, it flies much like a fullsize quad despite its diminutive size, is virtually indestructible, costs about $80, is accompanied by clear instructions, and is sold by a real company. “The Nano and Dromida are both supported by two of the largest hobby distributors in the world,” says Royer, who chooses it as his alternate pick to the Nano.
Alex Zvada of Flite Test concurs. “It’s a great buy for the money,” he says. “It’s really durable, and replacement parts are readily available and extremely reasonably priced. I know plenty of people who’ve become really proficient pilots on that thing—in just [a] couple [of] days.”
You could get something like the WLToys V95, but you shouldn’t. Yes, it comes with a camera (roughly .5 MP). And yes, it costs about $10 less. But the manuals have been printed in Chinese, the lights appear to be flimsily hot-glued to the arms, and ordering spare parts or getting questions answered is a hassle. Twenty reviewers give it an average 3.5 stars.
You should also avoid going for something super small and cheap like the Hubsan X4. It’s the best-reviewed quad on Amazon, but as this video makes clear, the thing is so small you often can’t tell which direction you’re flying, so you’re not gonna be honing too many skills. It’s a best-reviewed toy, not a trainer.
If money is no object, go for the $435 FPV version of the Nano, which is often in stock. As this Gizmodo review points out, wearing virtual reality goggles that receive a live view from an on-board camera is awesome. It feels like you’ve been shrunk and are riding on the back of a bumblebee. But of course it’s way expensive and flight time drops to just a couple minutes, thanks to the added weight of the camera and transmitter. So there’s no shame in sticking with a standard trainer like the Nano or Dromida and getting your FPV kicks with a fullsize quad.
If you’ve earned your wings with a trainer drone and are ready to commit, you’ll be pleased to know that after researching and testing all the top-rated camera drones we could find, the $1,135 DJI Phantom 2 Vision+ was not just the clear winner, but a surprise value.
$1,160 sounds like a lot of money, because it is. But compare it to what it costs to build a quadcopter with similar specs. The Phantom 2, for example, costs $960 with DJI’s exclusive three-axis gimbal (like the V+). Add a $400 GoPro Hero3+ Black and a decent $300 FPV system and you hit $1,660—$500 more than the V+. And then you’re not even getting the V+’s real-time flight data info, such as battery life.
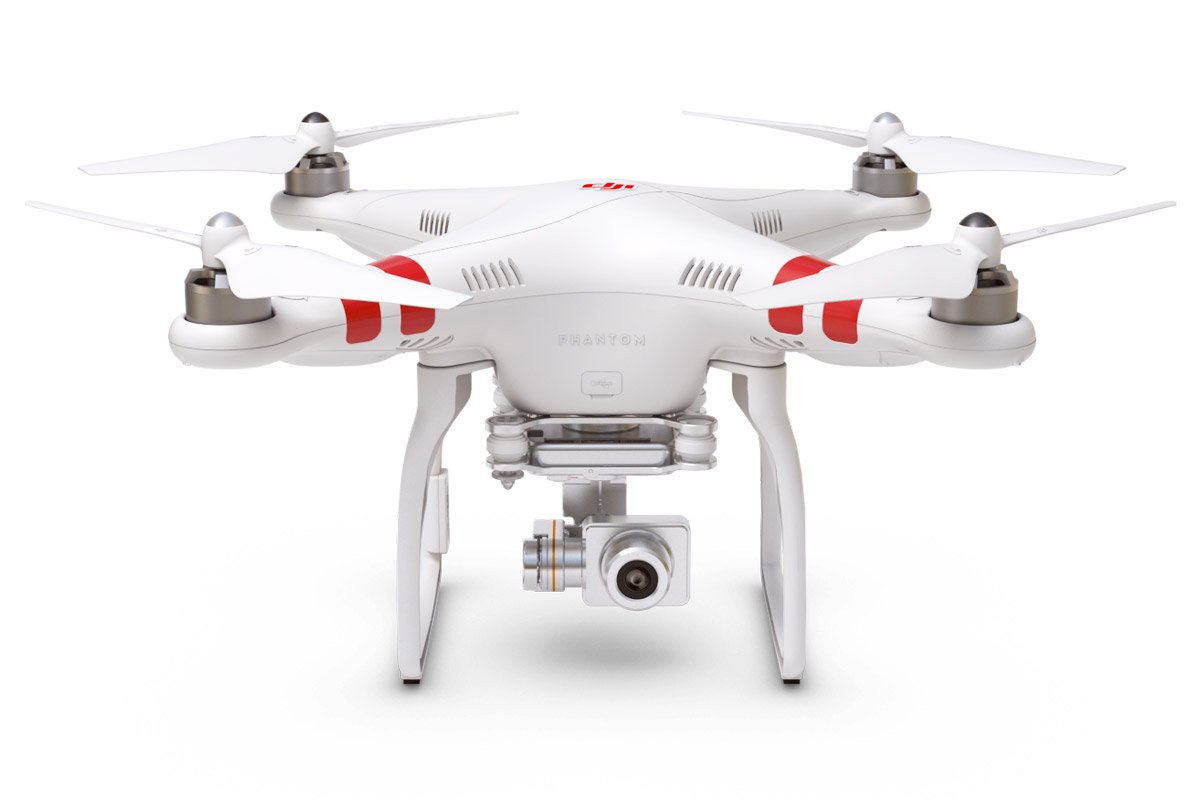
The V+ exactly as it arrives in the box, except with batteries charged and propellors spun on.
Or take a thriftier approach. The 3DR IRIS with a Tarot 2-D gimbal, a GoPro Hero3+ Silver, and a $250 FPV system ticks $1,520. The images from your budget-conscious rig will be shakier than the V+’s, and you’ll have invested hours to assemble the thing, but your price tag will still be $220 more than the V+. We could keep going (and do later on) but if you check for yourself you won’t find the V+’s price exorbitant relative to other systems in range.
Most importantly, the V+ takes solid photos and video. The image from the camera displays with almost no delay on a free iOS or Android phone app. (A slight update to our pick in November moved camera tilt control from the app to a dedicated dial on the remote control.) No matter which direction the camera is facing, the gimbal stabilizes the image beautifully. Crucially, and as hinted, only DJI’s gimbals erase jiggle and wiggle in three planes, providing the most stable footage available.
As a bonus, the V+ also seems to improve on a small but annoying problem with popular aftermarket gimbals: propellers showing up in the image frame. With other quadcopters carrying gimballed cameras, hard acceleration, common in high winds, often tips the quadcopter’s propellers into the camera’s view. This happens less with the V+—an experience echoed by Royer. “I shot quite a bit and didn’t see blades at all,” he says. “When I was rocking it back and forth to the extreme, there were a couple quick seconds where the tips of the blades were in the field of view. But I had that thing banked to the max.” However, keep in mind that we did see props in camera footage taken in higher levels of wind.
Did the images from the 1080p/30 720p/60 camera stack up to a GoPro? In a nutshell, kind of. The V+ camera’s DNG stills are much more detailed than a GoPro’s, their exposure can be adjusted midflight by app, unlike a GoPro’s, and the V+ camera’s light weight compared to a GoPro makes it easier for the gimbal to hold it steady, producing video and stills without blur. But the V+ camera’s smaller sensor falls short when it comes to shooting things like fields, oceans, forests, and rock formations. In those situations, which are unfortunately common, artifacts become more noticeable.
How big are these differences? An in depth comparison of the image quality of the V+ and a Phantom 2 with H3-3D gimbal and GoPro Hero 3+ says exactly how much. The GoPro Hero3+ is clearly better at 1080p video quality, but at web resolutions or at 720p video, the cameras are on par. If the GoPro isn’t shooting in ProTune and being heavily corrected in post-processing, then we think the differences in image quality are hard to notice. In the real world, both cameras are darn near as good as each other, as Gizmodo and Tested have noted. Which is to say, the V+ is good enough and then some. But, again, the limitations of the V+ camera will be seen when you are filming things like ocean waves or wind-blown grassy fields because the GoPro, especially in Protune mode, has a higher bit rate and so has fewer video compression artifacts. Professional video filmers will want to consider a Phantom 2 and separate GoPro, we think.
The V+’s app has more uses, too, which GoPro users will miss. The FPV (otherwise known as live-view) capabilities help with not only piloting but getting the right shot.
The V+’s smartphone app allows you to not only toggle between photo and video modes and preview your photography, but you can also manually control the tilt of the camera using the app if you want. (You can also control that by using the remote, or tilting your phone in the app, engaging the accelerometer.) Using a GoPro with Phantom 2 and H3-3D gimbal means you can only guesstimate the up-down tilt of the GoPro, the framing of the subject.
To get those and more with a Phantom 2 and separate GoPro, you would have to buy pricey aftermarket video feed transmission systems, pull out the wire strippers, watch or read some tutorials, and plug in that soldering gun or start ordering parts from Britain.
And even then, you’re still lacking important flight information that you get with the V+’s app. Altitude, position from the remote, direction, distance, number of satellites the V+ is locked to as well as video and still quality modes are viewable and controllable from your smartphone. (Many GoPro/Phantom 2 pilots are forced to film video and then land and switch the GoPro to still mode to shoot photographs.)
The V+ is also superbly easy to use in almost every way. With the Quick Start guide and manual—a rare 61 pages of color photos, diagrams, and generally clear instructions printed on actual transportable paper—not counting charging up the batteries, we were able to assemble the drone in five minutes. We were clear for takeoff a speedy 10 minutes later.
IRIS, by comparison, required 2.5 hours before getting the camera aloft. The V+’s RC remote controller also proved pleasantly sparse, with just two joy sticks, two switches, a dial, and an on/off switch. Compare this to the IRIS, with its plethora of fine-tuning adjustments and programmable controls, including 7 switches, 3 knobs, 4 sliders, and 6 keypad buttons. Later and on his own, my 73-year-old father got the V+ off the ground for his maiden flight, filmed in a moderate ocean breeze, and safely landed on a two-foot diameter spot after reading only the Quick Start guide. “It’s incredibly easy to fly, the best one by far,” he said.
And while the battery is expensive (a spare will set you back $125), it lasted a standout 25 minutes and was easy to charge. Just plug it in to the wall like a laptop charger. The Blade and most others come with chargers that require you to set the type of battery, select the number of cells in the battery, plug three cords into the right ports, and then charge. The difference wasn’t a huge deal, but did seem emblematic of the V+’s polish. After flying, the V+’s props spun off, making it easy to transport in the original box, too. The IRIS, on the other hand, required a wrench to unscrew nuts, then the nuts, lock washers, props, and plastic hubs had to be removed.
In the air, the V+ flew smoothly in multiple flight modes. Supposedly the V+’s brain, called the Naza M V2 autopilot, is bested only by the brain that DJI sells to Hollywood types, the Wookong. “The Naza M V2 is the best on its market in its price range,” says Royer. When releasing the sticks on the controller, the V+ appeared to hold its position better than the Blade and IRIS, hovering nearly motionless at a single location, at a single altitude. But it’s tough for laymen to tell the difference. Just as it’s tough to say that one quad returns closer to the landing zone when the “return to home” feature is engaged. (As this and this video show, both the Phantom 2 and Blade, for example, hit the target and miss by up to 10 feet.) They’re all plenty capable at flying; the V+ might be a bit better.
We’ve yet to get excited about the ability to fly autonomous missions—programming waypoints into an app or computer, downloading instructions into a quadcopter’s brain, and watching the quad film and fly a precise route without our thumbs on the controller. But we can see how it’s cool, especially for surveying or other scientific applications. As such, DJI’s announcement that autonomous missions are now possible with the V+ is a pretty awesome perk. Autonomous flying was previously one of the main reasons to go for IRIS or an even more complex DIY-oriented setup, so DJI’s announcement is good news for ambitious customers who like to avoid hassle, but bad news for competing drones like the IRIS (or the recently Kickstarted Hexo+).
More importantly, if we had had any questions about the V+, the answers are easily found online. DJI has the largest online community around. Congregating primarily at Phantom Pilots, they help noobs, share mods, gather for regional meetings known as “fly-ins,” and hack things like the FPV system, doubling or tripling its roughly 2,000-foot range.
“As far as an all around platform, DJI is actually phenomenal—really really good,” says Flite Test’s Zvada, who generally encourages people to build their own quadcopters. “And the Phantoms are pretty reasonably priced, especially including the RC transmitter.”
Flaws but not dealbreakers
If you’re shooting for the local cinema, you could do better than our main pick because the image-quality of the V+ camera while filming isn’t the absolute best.
“I long for the ease and simplicity of the Vision 2+ system, but with the image of my GoPro Hero 3+!” says filmmaker Bloom. “As it stands, if you want the better image (and who doesn’t) then the non-vision 2 with Zenmuse H3-3D gimbal and GoPro Hero 3+ is the better option, even if you do have the pain in the arse of all the bits for the FPV 3rd party system!”
(Again, to get the live view of the Vision 2+, one has to solder in their own vision system with power and antennas that broadcast to a monitor or heads up display. The setup will cost a few hundred dollars, be complicated to set up for most, and will still be lacking some features.)
Furthermore, DJI is experiencing crazy growth as a company, and their tech supportcan take anywhere from a few days to over a week to respond, although people laud them for being generally solid and responsible once you do reach them. Wirecutter founder Brian Lam had a Phantom 2 Vision+ with a shaky gimbal that needed to be swapped, and his second unit had Wi-Fi problems. This is a new category, so Apple-like polish in products is not here yet, although DJI does come the closest.
Finally, and this should really go without saying, these things are not built for heavy abuse. Yes they will be able to fly in fairly stiff crosswinds, but no, you should not be taking this thing storm chasing.
Also, if it crashes, you’re probably going to have to fix it. But that’s not a unique problem.
The competition
Only three models shipped the way we like—with an almost GoPro-quality camera, gimbal, and FPV set-up.
Of these, one (the V+) is our pick, one (the Blade) was a decent competitor, and the last (the Walkera) was easily dismissed.
The recently released $900 Blade 350 QX2 AP Combo RTF would be OK for someone who is already into the RC hobby, has a tight budget, and is curious about aerial photography. But for the rest of us, it’s not quite good enough or any real bargain. The camera, gimbal, live-view app, battery life, and flying range fall short of our pick.
The manufacturer claims the C-Go 1 Camera 1080p/30 camera is on par with a GoPro 3 Silver, which means it might be as good as the V+ camera in some instances. That’s OK, but it’s definitely not class-leading. And it’s not easily upgraded. If you want to swap out the C-Go for a GoPro, which you can do, then the accompanying app will no longer show a live view of what you’re shooting, so you also have to buy an aftermarket FPV system for around $250. Bummer.
The gimbal is only two-axis, instead of the V+’s three-axis, which is another letdown, because the images won’t be as smooth. “By the time the Blade comes out with a two-axis gimbal, DJI has already obsoleted it with their three-axis gimbal,” laments Royer. “Three-axis is going to be all the rage for 2015.” Also, you can’t tilt the camera midflight to frame shots from different angles. It’s stuck looking wherever you left it when you took off. This is another disappointment, since tilting the camera is of course required to frame attractive photos and videos.
You can control the gimbal mid-flight if you buy a radio controller that has at least eight channels, such as the Spektrum DX8, and set it up so that one of the channels controls the gimbal. But that’ll cost you an hour at your workbench, and, if you don’t already have a compatible 8-channel radio, another $300.
The app, battery, and range are the final demerits. The 350 QX2 app displays the camera’s FPV image on Android and iOS devices, like the V+ does, but it doesn’t allow you to adjust the camera’s exposure midflight, nor does it show remaining battery life, like the V+ does. The battery itself lasts only 10 minutes, instead of the V+’s 25 minutes. And the 350 QX2’s range certainly won’t trump the V+. The manufacturer said it’ll fly “a couple hundred yards” away. Given all this, the inexpensive Blade system no longer looks so inexpensive, or so ready to film.
The 350 QX2 was a prototype when we were testing, so we weren’t able to test all these things, but flying the naked 350 QX2 wasn’t so fun that we were willing to look past the other shortcomings.
Most importantly, one of the Blade’s unique, highly-touted features proved less than ideal. In what Blade calls Smart Mode, the electronic brain in the quad makes sure that when, for example, you push the right stick away from you, the quad flies forward relative to you, not relative to the nose of the quad, as is typical. This is great for first flights. There’s no need to keep track of which way the quad faces. Even a young child can fly it. But if you’ve trained on the Nano, which doesn’t use Smart Mode, then you’ve learned how to fly the usual way, and the “easier” Smart Mode is disorienting.
Said my father: “Boy, that just confuses me.” It also doesn’t help with filming. With filming, you want the traditional setup: flying forward relative to the camera, not relative to wherever you happen to be standing.
In the 350 QX2’s favor, there are 1,500 hobby stores in the US that carry Blade products and parts and, judging by our experience in two stores, they’re staffed by friendly, knowledgeable folks.
That said, it’s definitely not our main pick. To an RC hobbyist, all of the compromises allow for a cheap way to mess around with aerial photography. Three reviewers at Horizon Hobby give it 4.7 stars. But to the rest of us, the 350 QX2 is a lot of money for something we don’t really want. Currently there are no reviews on Amazon.
The naked Blade flies into the sunset.
The $900 Walkera QR X350 PRO FPV GPS RC Quadcopter G-2D Gimbal, iLook Camera, DEVO F7 raises many questions. It has virtually no editorial reviews or user reviews. Its camera appears inferior to the camera on the Vision+, but we have no real proof. However its gimbal definitely is inferior. It corrects wiggles in only two planes, instead of the V+’s three. Royer wasn’t impressed. “Walkera makes really nice helicopters,” he says, “but the quad just isn’t up to snuff. It’s lacking quite a bit compared to Blades or Phantoms.” The $260 savings compared to the V+ isn’t any kind of savings at all.
Then we lowered our standards. If we were willing to fiddle and sometimes solder, which we weren’t sure we were willing to do, then there were nine models that carried a GoPro and gimbal and used FPV. Thanks to the fact that adding a GoPro, gimbal, and FPV system costs roughly $1,000, most of these were too expensive.
The $750 3DR IRIS ($981 with Tarot 2D gimbal) flew beautifully (after some initial futzing). In the air, IRIS’s flight modes range from a docile “Loiter,” like the V+’s default, to a thrilling, extremely acrobatic “Stabilize” mode that had the big quad leaping and bounding. It flew for over ten minutes, hovered steadily (though perhaps not quite as steadily as the V+), and returned to launch when signalled.
A tech-savvy person could have it do much more. The Flite Test guys used the open-source, programmable brain and eight-channel RC controller to control a servo that had IRIS (well, actually the 3DR hexacopter, but same diff) automatically drop a parachute of candy bars. Others have used the flexible brain to create fun and useful new flight modes, such as Drift, which basically allows you to fly with one stick. A “Follow Me feature” allows it to track any GPS-enabled device running the (Android) ground station, allowing for “the ultimate selfie” as they say. Apparently, people have even programmed IRIS to fly in formation, or “swarm.” “For a DIY guy, it’s awesome,” says Royer. Indeed, people are doing so much cool stuff with IRIS that we wonder how soon before filming and photographing is just one tiny reason a person buys a quadcopter.
But for now, photography is a quadcopter’s big appeal, and in testing, the IRIS mostly highlighted the V+’s ease of use for us non-DIY guys. At first, it was a cinch. I attached the red landing gear so I could better see the nose of the craft, pushed the provided hubs into propellers, and bolted on the propellers with the provided wrench. The paper quick start guide was fantastic, with big color pictures, clear English instructions, and little bonus “flight tips” at the bottom of pages. Twenty minutes after starting, I was ready to fly. Awesome!
However, problems arose when I had to set up IRIS for filming and leave the printed manual behind. On the IRIS support page, the link to a video about how to set up the software was dead. The video about installing the gimbal appeared to be out of date; it showed a gimbal with two wires, mine had three dangling free. Once I installed the software on my Mac, I had to go to Apple support to find out how to override “gatekeeper protection” so I could launch the app. Once in the app, an instructional video told me to select one Comm port dropdown menu while a PDF told me to select another. All in all, I spent some two hours bouncing between PDFs, instructional videos, and google searches, sometimes trying to identify parts that weren’t identical to those in my box.
When I took off for my first filming flight, things did not go well. I had to squat down and fiddle with the GoPro (or use the GoPro’s clunky remote) to select the GoPro settings. You also have to do that with the DJI Phantom 2, but compared to the easily accessible camera settings in the mobile app of the V+, it still irks. After liftoff, IRIS climbed about five feet, whipped left, and couldn’t be made to hover, for some reason. Out of control and heading fast for a tree, it crashed into tall grass. Later, I watched 12 video tutorials and read many of the downloadable PDFs, even the ones I didn’t need. I removed the gimbal in about 5 minutes, took 20 minutes to re-calibrate the accelerometer (which required three attempts), and started over. It flew great, but the experience made clear the cost of an open-source, highly tweakable model. My father, feeling intimidated, declined to give it a try.
The 3DR X8 uses two props on each arm, so it can still fly if one fails—great if you’re carrying precious cargo, but, well, redundant for a GoPro. And expensive. It costs $1,300 bare, bringing the kit total to roughly $2,300 including a camera, gimbal, and all the accompanying accessories.
The Lumenier 400, 500, and 540 models are widely celebrated for being the most nimble camera-ready quadcopters out there. Midwest Rob and others sponsored by Lumenier are generally considered the most acrobatic quadcopter pilots in America. And the Lumeniers are only getting better. The company recently announced a $190, two-axis, hot-swappable gimbal, so pilots can film one minute and then remove the gimbal with the turn of two screws and fly without worrying about their camera. And the gimbal is mounted at the nose, not hanging underneath, so there are never any props in the frame, as there are with virtually all others. But the bare 400 model costs $1,254, making the kit at least $2,154. That’s simply too expensive for your typical amateur photographer. And the larger 500 and 540 cost even more—way too much, in other words. Twelve reviewers at getfpv.com give it 5 stars.
The Team Black Sheep (aka TBS) DISCOVERY PRO Gimbal Frame is similar to a Lumenier and costs even more: $1,500 bare or $2,500 after you’ve soldered on the extra bits.
The bare DJI F550 and F450, which cost $1,350 and $1,300 when built by Atlanta Hobby, also cost roughly $1,000 more with a filming kit and require soldering. Some people have been able to hoist small DSLRs on the 550, which is cool, but a gimbal for a DSLR costs more than the airship. If we were that serious about film and image making, we’d step up far further to something like a DJI S800.
How about other DJI quadcopters?
DJI introduced a step-up version of our pick, called the Inspire 1, which will appear on shelves some time in mid-December. It’s going to cost $2,800, far more than our current Vision+ pick, but it does have super high-quality video capabilities: it can do 4K video at 30fps and 1080p at 60fps, while also taking 12-megapixel photos. It’s got a lot of bells and whistles: the camera can swivel 360 degrees and tilt 125 degrees, and thanks to the addition of a ground-facing camera, the landing gear will automatically retract and deploy on take off or landing. DJI says the ground camera will also allow easier flying indoors, or areas where GPS signal is low. DJI is also making an accessory that’ll allow you to take the stabilized camera off of the Inspire 1, and use it hand-held (but they haven’t announced what this add-on will cost).
The Verge’s Ben Popper calls it “the coolest drone I’ve ever seen,” but also says it’s not really a good investment for people new to drone flying, and is more likely a step-up option for experienced flyers who want to expand their skills. CNET says the battery life will be something to consider since shooting in 4K will keep flying times to just 18 minutes.
We might recommend something like the Inspire 1 as a step-up pick in the future, but these days, if you’re going to spend thousands of dollars on a drone, then you’re not a typical reader, and you probably know what you want anyway. If you’re just curious about fancier drones, then we suggest you dig into the forums and subscribe to the excellent MultiRotor Pilot magazine. They both do a great job of keeping up on advances in high-end, drone-compatible cameras, gimbals, controllers, and more.
The DJI Phantom 2 is a great choice for some, especially engineering types who already own a GoPro. It costs $799 with DJI’s class-leading, no-solder-required H3-3D gimbal. (Here is a comparison of stability of DJI H3-3D gimbal and older H3-2D.) Adding an FPV system only pushes the cost to about $1,059, right on par with the V+. But, as this video shows, it requires soldering and more tinkering. And you have to bring your own GoPro, which will cost another $400. And it wouldn’t give you some of the V+’s in-flight data display, which would cost about $200 for something like the iOSD Mark II. And it’d feel more like retrofitting than building. A British company has begun selling a custom-made $20 wire to allow people to install an FPV system onto a Phantom 2 without soldering, which sounds enticing. But it only works with one brand of FPV system (Fat Shark). It requires the additional purchase of at least an $80 DJI iOSD mini or iOSD Mark II, boosting the cost of the complete version of the Phantom 2 and GoPro to $1,559 or $1,659, roughly $400 more than a V+. And it’s still a pain in the ass to install, involving tearing apart the guts of your Phantom and watching tutorials like this. Basically, if you’re a DIY gal or guy, you’d probably be much happier with the open-source IRIS and its passionate, innovative community. 62 reviewers give it 4.4 stars on Amazon.
The $479 DJI Phantom 1 was great when it debuted but is no longer easy to use. It employs an old, inferior version of DJI’s electronic brain that doesn’t hold its position as well and is difficult to upgrade or match to that latest filming equipment. Some people buy these as practice drones, but we feel that you’re better off with a cheaper indoor practice drone at first, jumping straight to a Vision 2+ after that.
Lowering standards even further, we looked at five quadcopters that have cameras and FPV but aren’t meant to be used with gimbals: the Walkera QR X350 FPV GPS Quadcopter with Return to Home, DEVO F7 and 5.8 GHz Camera, the Lumenier 250, the DJI Phantom 2 Vision, the $309 Parrot AR Drone 2.0 GPS, and the DJI Phantom FC40.
The lack of ability to add a gimbal is a dealbreaker. Even if the cameras are somehow better than a GoPro, and they aren’t, the image quality will still be far degraded when video is cropped in the post-processing required to yield footage that doesn’t induce queeziness. These are fancy toys.
What to look forward to
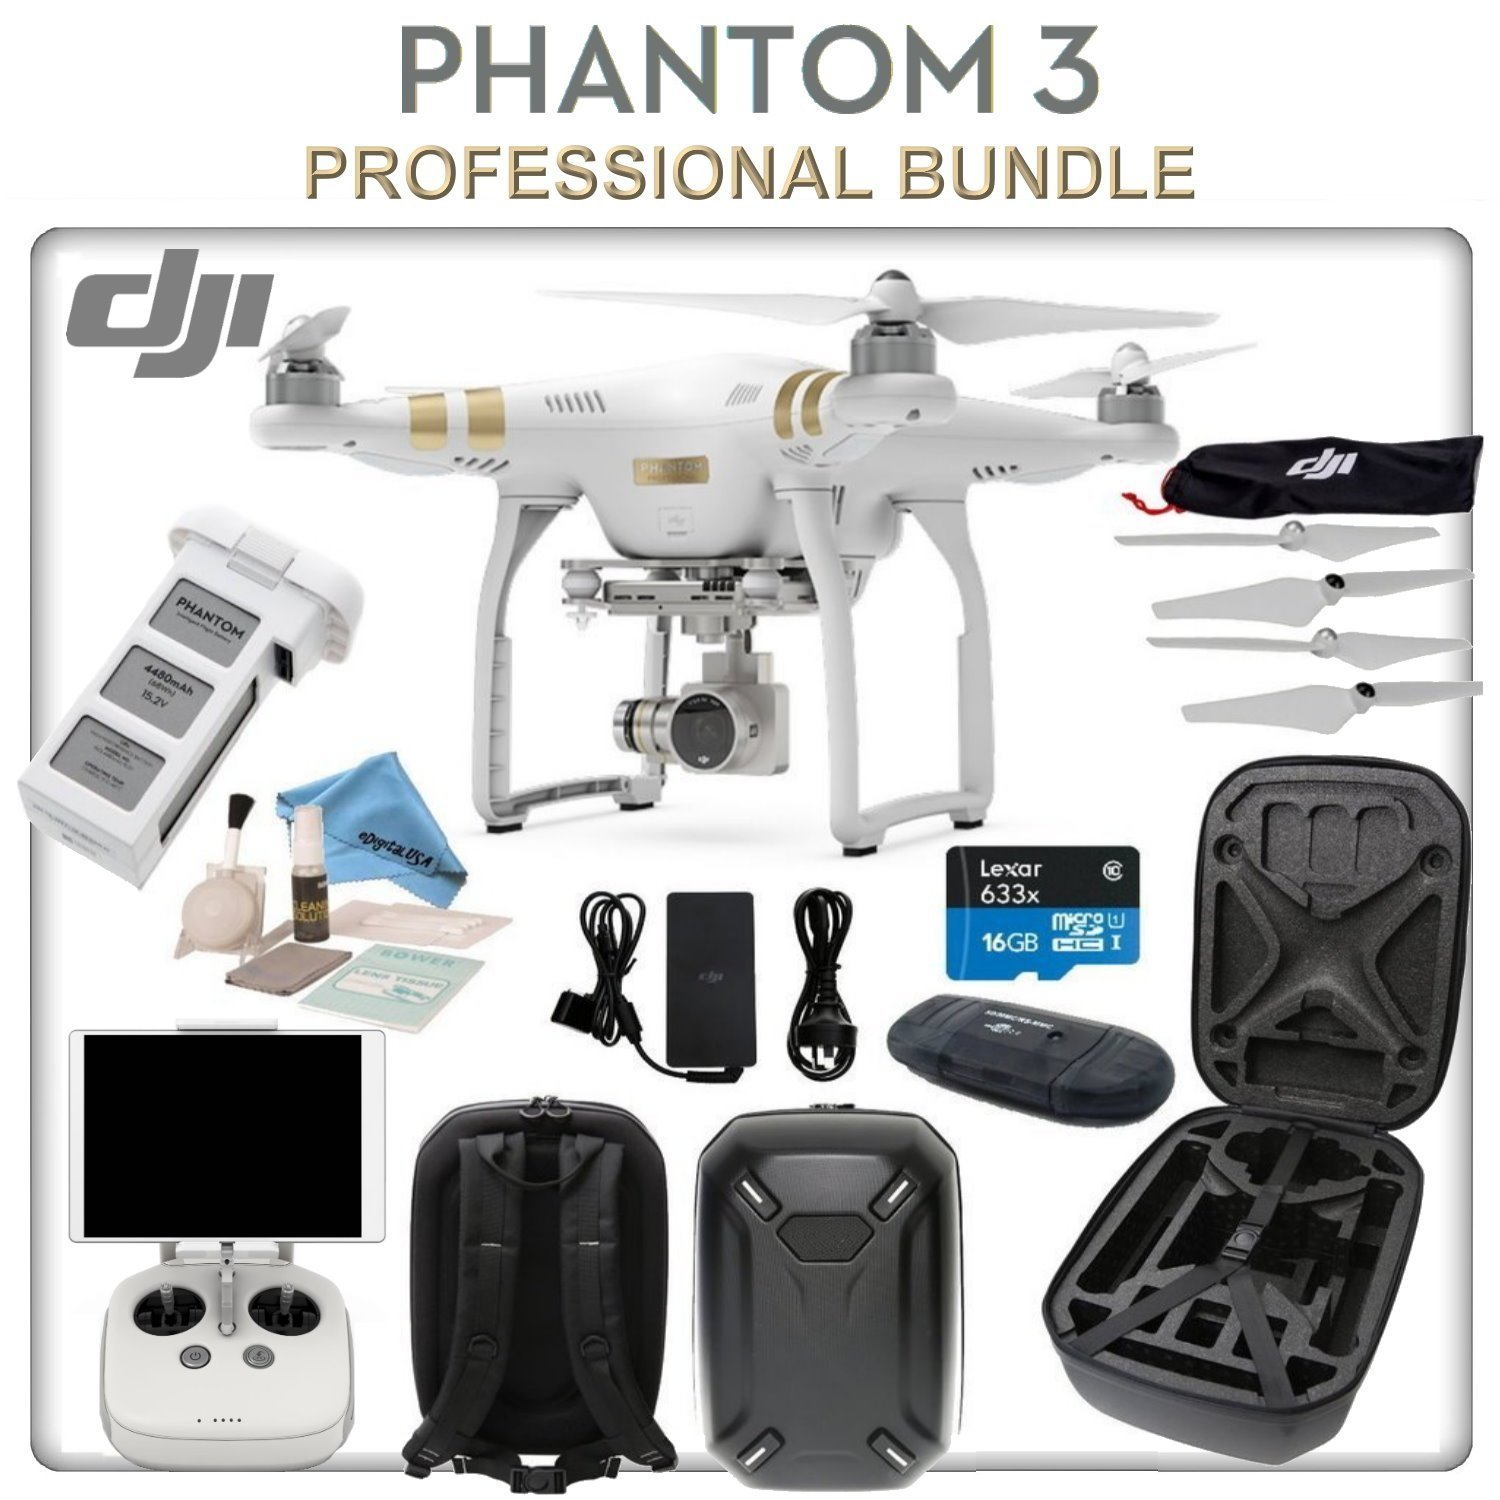
DJI announced a new model that should improve on our current pick: the Phantom 3. It comes in two versions: the Professional (with 4K video, and 24/30 fps) for $1,260, and the Advanced (which records 1080p video at 60 fps) for $1,000. Otherwise they’re the same: Drone operators can now see the video while shooting live on the included remote, and there’s now an option turn on live broadcasting over YouTube during flights. Both also come with more precise GPS tracking for flight stabilization, and incorporate the sensors found on DJI’s Inspire 1 that enable the drone to fly indoors or very close to the ground. With a new battery, the flight time is improved to 23 minutes.
We’re most interested in the Advanced model as a possible new pick for most people. If you have the hardware to work with 4K video, or you absolutely must have 24 fps, then you should consider the Pro. Otherwise, we’ll want to compare the Phantom 3 Advanced to our current pick. Pre-orders are open, but the Phantom 3 won’t be delivered until the end of April.
Right after DJI’s announcement came 3D Robotics’s introduction of the Solo drone. It also comes in two versions: with a GoPro gimbal ($1,400) or without ($1,000). Wiredsays the remote it comes with “looks like an old-school video game joystick” with a holder for placing an iPhone or iPad. The Solo has tools geared toward new flyers, including a controller “panic” button that instantly stops the drone. But it’s also aimed at the more technically advanced, and is being sold as an open platform, so those who like to tinker can play around with it.
Like the new Phantom, the Solo can stream high-def video back to your mobile device. Probably the most interesting feature is the ability to draw your a flight path on your phone or tablet screen, which the drone then follows in the air. You can also pick a place for it to “orbit” and it will fly perfect circles around that point. Because 3DR has worked with GoPro to tightly integrate its cameras into their software, GoPro settings can be switched up mid-flight. The Solo doesn’t arrive until May, but we’ll be keeping an eye out for it.
We were looking forward to the Kickstarted Zano drone, but the the team has missed several expected ship dates over the course of this year. The drone that finally shipped in September was lacking several promised features. Ivan Reedman—the head of the Zano team—resigned in November. The company is liquidating assets, so backers will not get their drones and are unlikely to receive any money back. We’ll have new drone picks soon, but the Zano will not be among them.
The Aries Blackbird X-10 ($800) has a 16MP camera with a 120-degree field of view, and can shoot 1080p video at 30fps. It doesn’t have a gimbal, but the company says it uses a combination of a six-axis gyro and GPS to maintain stability. It comes with a controller, but you can control the drone and get a live view from the accompanying iPhone or Android app, and with its Wi-Fi range extender, the Blackbird can fly up to 1,000 feet away. We’ll be watching for the first reviews of the Blackbird, and especially for video quality and stability.
Parrot has announced the successor to the Bebop, the Bebop 2, which promises increased flight time and higher speeds. It should be available by the end of the year. The newer model uses the same stabilization as its predecessor, and though we didn’t think it competed with the gimbals used on our picks, we’ll look into whether Parrot’s changes make it a more viable contender.
DJI’s marketing manager did a recent interview with a Dutch and Belgian website, and when asked about future drone models he said that they’re planning to continue to improve flight safety, add better cameras, and fit even smaller sensors on board. “It’s also no secret that the entire industry is moving towards sense-and-avoid technology,” he said, “which allows the aircraft to know where objects are and steer out of their way.”