Voice recognition on the Mac is nothing new. Years before Siri came to your iOS device – indeed, before there were any iOS devices – it was possible to control your Mac and execute commands by speaking them, Star Trek-style.
Siri, however, has certainly upped the ante. The amazing “intelligent assistant” on the iPhone, iPad, and iPod touch can carry out your commands, insert your dictated words into an email, and even answer your questions. It doesn’t always work flawlessly, but when it does, you feel like Captain Kirk conversing with the computer on the Enterprise.
OS X doesn’t provide all of Siri’s functionality on a Mac, but you can dictate text to it. Just as you can on your iPhone, you can sit at your computer, speak, and your words appear on the screen. Dictation works in any app which you can type into — Notes, TextEdit, Microsoft Word, forms on web pages in Safari, and so on. First, though, you need to turn it on in the Dictation & Speech pane in System Preferences.

By default, an Internet connection is required for Dictation to work, because it sends your spoken input to Apple’s server farms to be deciphered and converted into text. This is both a good and a bad thing. It means Apple can bring to bear vastly more processing power than any single personal computer can offer, and it allows Apple to steadily improve its interpretation algorithms.
On the other hand, nothing appears on screen until you finish speaking and click Done to send your words to Apple, and there’s a very slightly unsettling lag while they’re deciphered.
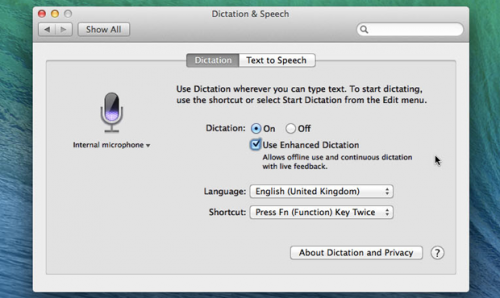
Mavericks added the ability to dictate text while your Mac is offline. It’s called Enhanced Dictation. Although it inherently lacks the benefits of performing translation on a server, it continuously translates your speech into text. Put a check next to Use Enhanced Dictation to turn it on.
Dictation is not perfect. As with all speech-recognition software, it helps if you speak artificially clearly and distinctly; you have to remember to say “comma” and so on; and you need to spend a little time checking the text and correcting errors. The online version of Dictation, while benefiting from the computing power of servers, also needs to transmit certain personal information to Apple, such as names from your Contacts so it knows how to spell them — click About Dictation and Privacy at the bottom of Dictation’s System Preferences pane to find out more about what is sent.
All that said, Dictation is amazing. If you find typing difficult or just want a break from the keyboard, give it a try!
Control Your Mac with Voice Commands
Go to System Preferences > Accessibility, then click on Speakable Items. Under Settings, switch on “Speakable Items,” and a microphone button appears on-screen. Press the key indicated under this, then speak a command. For a list of commands, click the triangle at the foot of the mic window, and select “Open Speech Commands window.”
Conversely, your Mac can speak the text in messages and alerts to you — in System Preferences, click the Text to Speech tab in the Dictation & Speech pane (see step 2 below), and enable “Announce when alerts are displayed.” Click “Set Alert Options…” to choose what voice is used, how things are phrased, and how soon after an alert appears.
How to Use Dictation on your Mac
1. Enable Dictation
How to Use Dictation on your Mac
In your text-editing app, choose Edit > Start Dictation and confirm you want to turn it on. To use it offline, check Use Enhanced Dictation and wait for files to be downloaded. Regular Dictation may transmit data to Apple — mainly contact names — to aid in spelling them.
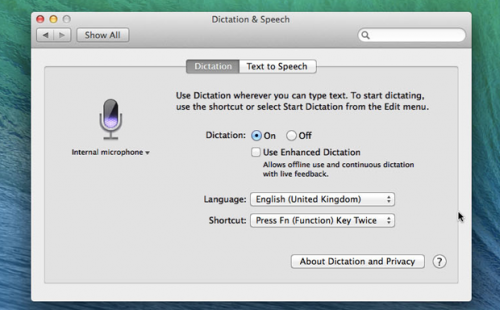
2. The Preferences Pane
The Preferences Pane
You can also enable Dictation in System Preferences, and change some of the default settings. Go to the Apple menu and select System Preferences. Next, click Dictation & Speech, then click the Dictation tab and check the Language settings. You can change them here.
3. Choose Shortcut
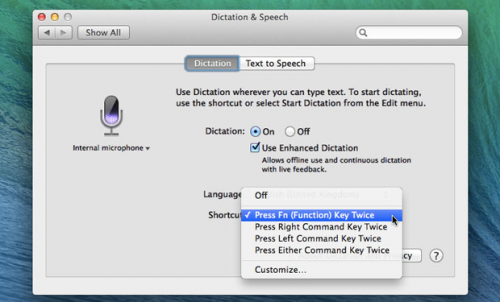
By default, tapping the Fn key twice activates Dictation. This key is at the bottom-left of an iMac or MacBook keyboard but harder to find on an Extended Keyboard (look above the arrow keys). You can, however, change the shortcut or set up your own key combination. To do so, in the pop-up menu select Customize, then press the combination you want — Alt + Shift + Cmd + D, say. Note: Double-presses won’t work.
4. Choose a Language
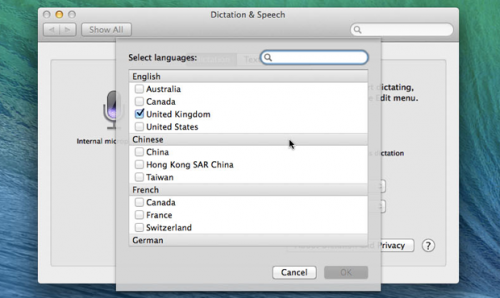
The Dictation feature isn’t available in every language, but you can choose from a few, including different versions of English (Australia, Canada, UK, and US). You can also change languages within one document, but you need to do so before dictating the relevant text.
5. Change Input Source
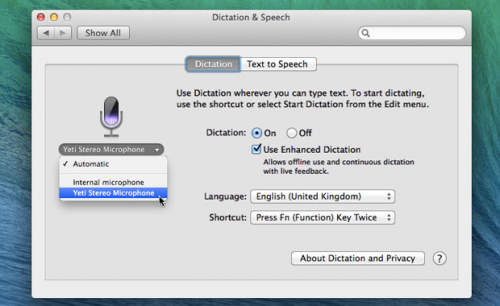
Dictation pauses iTunes and switches off your Mac’s fan to pick up your voice as clearly as possible. This may not be enough in a noisy environment, so you can use an external mic. Set it as the system-wide input in the Sound pane, or just for Dictation as shown above.
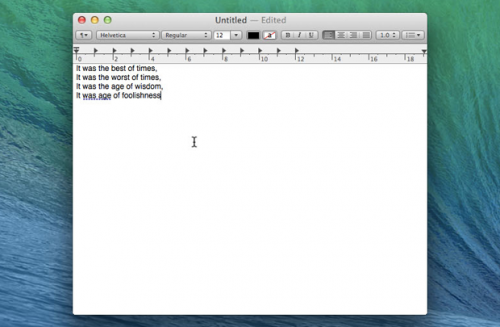
6. Using Dictation

Dictation is available in any app you can type in. You can activate it at any time using the Edit menu command or the shortcut you set. A mic icon appears near the text cursor. Unless you turned on Enhanced Dictation, text won’t appear until you press the Done button.
7. Using Punctuation
To punctuate your text, say what you want, when you want it – “comma,” “period,” “apostrophe,” and so on. Try to be precise: “dash” is different from “hyphen,” for example. You can also use format commands such as “new line,” “new paragraph,” or “caps.”
8. Correct Any Errors
When you’ve finished, click the Done button so that Dictation stops listening to you, or tap the shortcut key again. Any text that Dictation suspects it interpreted incorrectly is highlighted. Right-click this text for alternatives and options, or edit it yourself. –